Automatically or Manually : Import Your Posts from Google Docs to WordPress

Creating a WordPress blog is one thing, but writing an effective post is completely another.  You can get a professional WordPress theme developer to create a great looking blog, but having content in there is what makes all the difference.  You might either write your company blogs yourself or get expert writers from a WordPress development company to do it for you.  In either case, there are very few people who write their posts directly on WordPress Editor.  The reason for that is that using WordPress Editor can be challenging, and it doesn’t offer as many options as some of the third party software tools do.  One of the more popular tools for writing WordPress blog posts is Google Docs.  In fact, we have seen various professional WordPress web developers recommending Google docs to their clients.  Google Docs is known to have some great functionalists.  However, the challenge might be for people to bring their Google docs posts over to WordPress.  In this blog posts, we shall talk about manual and automatic ways of doing so.

WHY GOOGLE DOCS?

First, let us talk about the reason why you would use Google Docs.  We mentioned earlier, experts tend to suggest this tool.  Here are some of the reasons why Google Docs outdoes WordPress editor:

  • Work is Safe:  The first important part to note is that your work is safe.  Google Docs has an auto-save program that makes sure that your work is not lost.  So strong is this auto-save program that you can lose internet connection or even close your browser, and you would still have your document/s saved.  WordPress Editor has an auto-save system too.  However, it is not exactly instant.  If you are good with coding, you can bring the auto-save duration down to 60 seconds.  Perhaps, you can ask your WordPress website developer to help you with that.  However, losing work worth 60 seconds can also be very annoying.  Also, there have been times when the auto-save feature hasn’t worked perfectly.
  • Comments:  When you are writing your document, you might have comments on the way.  Google Docs makes it easy to have those comments.  You can go back to those comments at the time of editing.
  • Collaboration:  You might be working with a writing team.  In that case, Google Docs makes it possible for you to easily collaborate with your team.  Once you have written your document, you can share it with others in the team and they can offer comments/suggestions.

MANUALLY MOVING POST OVER TO WORDPRESS EDITOR

Here are the steps that you will adopt to move your post over from Google Docs to WordPress Editor:

  1. Format in Google Docs:  Google Docs offers some sensational and handy formatting options.  You can have your H2 and H3 tags.  Moreover, you can also bold your text and do other things.  All of these formatting changes will smoothly transition over to the editor.
  2. Clean Up your HTML:  When you move over the post from Google Docs to WordPress Editor, your code will not be clean.  The post might look fine at the frontend, but the backend might be in some serious trouble.  An example of the same can be the <SPAN> tags you see around blocks of text.  It is not good for code cleanliness.  You can use tools like HTML Cleaner for the job.  All you need to do is paste your existing code and you will receive the cleaned code.
  3. Post Text to WordPress:  Code is cleaned up, now.  Hence, you can directly paste the text into the text tab of the editor.  When you switch to the visual tab, you will be able to see how your post looks.
  4. Add Images:  This is the final step in the process.  You pick images of your choice, and add them to your post.  You can use various tools to optimize and/or resize your images.

AUTOMATICALLY MOVING POST OVER TO WORDPRESS EDITOR

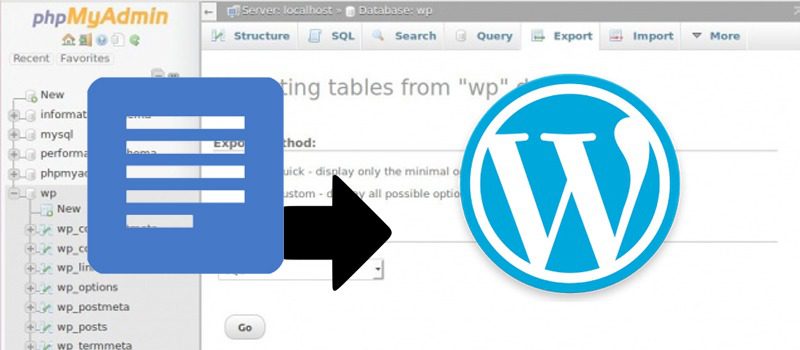
There is also an automatic way of transferring your post to the WordPress Editor.  There are multiple ways and tools that you can use.  One tool that has achieved some popularity is Wordable.  It allows you to export the entire post, and this includes even images.  Your post is quickly transferred over from Google Docs to WordPress.  The fact that images can be uploaded automatically is a great plus of the automated process.

This information shall help you in making sure that the process of transferring your blog post from Google Docs to WordPress Editor is hassle-free.

Add Push Notifications to Your WordPress Website & Engage Your Customers

When we talk about push notifications, you might all get reminded of those notices you get on your smartphone every time you receive an email or a message on WhatsApp.  You would agree that these notifications keep you engaged with the app, and make you go back to it more often.  These notifications are now available with browsers too, and can hence be delivered through a website.  On the browser side, they are known as web push notifications.

When users visit a website that sends notifications, they will receive a prompt from the browser to allow notifications.  If the users allow such notifications, the website will be allowed to send frequent messages.  These notifications can be received by users of Google Chrome on desktop and Android devices.  Moreover, they can also be received by users of Mozilla Firefox and also Safari for desktop and laptop Macs only.

How Can Push Notifications Help You?

So, the next question is if such web push notifications can be of help to you.  Your marketing team makes use of the social media and also sends regular newsletters via email.  In that case, would push notifications be a worthy addition to your marketing repertoire?  It depends on a couple of factors.  You need to ask yourself the following questions:

  • Is your site’s information updated on a regular basis?
  • Is it that you want your users to return to your site regularly?
  • Does your website release time-sensitive information, like breaking news?

In both these cases, you will be able to use these web push notifications to encourage repeat visits.  On the basis of the factors, the following 3 types of sites will benefit the most from these efforts:

  1. Blogs because they publish regular content
  2. News sites that publish breaking news
  3. Websites that regularly update content and information

Again, it is worth noting that such efforts will not replace your existing marketing efforts.  It is about increasing your site visitors’ loyalty.  What also needs to be known is that you should never abuse this ability.  Opting out of web push notifications is very easy.  Hence, posting advertisements or displaying affiliate offers can be harmful to you.

What’s the Process?

So, the users that visit your site are prompted by their browsers to allow push notifications.  Once allowed, the browsers register a script that is supplied by you.  You can customize your notification script.  However, the easier way is to use third-party service that supplies scripts to you.  When you want to push a notification, your service provider uses the registered script to deliver the notification to the subscribers.  Online subscribers will see an instant pop-up on the bottom ride of their screen.  If they aren’t online, they will see the notification when they open their browsers the next time.

Various Service Providers

There are various service providers who offer web push notification service.  Some of the more renowned ones include:

  1. OneSignal
  2. PushCrew
  3. PushAssist
  4. PushEngage

All of these are extremely good, and your choice will generally depend upon your exact needs.  For example, Push Crew offers ease of use and simple opt-in experience.  On the other hand, Push Assist and Push Engage make you do a lot of things from within your WordPress admin area.  One Signal, on the other hand, has an unlimited free plan and is extremely feature rich.

Starting Up with One Signal

One Signal is one of the most popular service providers.  Here are steps you can use to start-up with One Signal :

  1. First, install the OneSignal Plugin.
  2. Next, you need to create an account with One Signal and add a new app
  3. You then connect your OneSignal account to your WordPress website
  4. You set up notifications and start sending them out

As easy as this sounds, there are complications you will find on the way.

About DIT INTERACTIVE

If you want more information about starting up with web push notifications, we can offer our expert support to you. We are a renowned offshore WordPress development company. There are a large number of global clients that we have worked with in the past.  By the virtue of adept on-roll WordPress web developers, designers, and WordPress theme developers; we manage to offer comprehensive and top notch service.  These, along with our continuous focus on customization, make is WordPress website developerof choice.

Procedure to Add and Use Widgets in WordPress

WordPress is the most popular CMS –Content Management System, which is used by millions of people all around the world for creating blogs of varying, shapes, sizes and flavors. Being an open source CMS, it is used as blog publishing application that is powered by PHP and MySQL.

If you are looking out for any quick and easy way to place yourself on the web, then WordPress could be helpful in building a personal website without having any prior knowledge about web development, programming or comprehensive knowledge of HTML. WordPress provides everything required from the beginning to the end.

Want to be a WordPress Theme Developer

If you want to become a WordPress theme developer, then you must know about the widgets in WordPress. Along this, you need to know how to add and use widgets in WordPress. The widgets that are found in the admin area of WordPress are tiny blocks with specific functionality that can be placed in the WordPress sidebars which are also known as Widget-ready areas on the webpage.

These WordPress widgets are created for providing easiness to the way of designing and structure control of the theme of WordPress. These widgets can be easily dragged and dropped into the specific widget area. For the beginner WordPress website developer, the WordPress widgets is an easier way to add things like galleries, quotes, popular posts and other dynamic items on the WordPress site.

These WordPress widgets can be found going to the Appearance-Widgets section in the WordPress dashboard. These widgets in the WordPress allow you to add content and features in the areas that are widget areas of the theme. The widget-ready areas are mostly in the sidebar but also can be in the header, footer, below content and also in any other area in the theme. You must note this that the available widget areas in the theme would vary from theme to theme. For being a WordPress web developer, you must know that the WordPress themes are widget ready and even have multiple widget areas. If you don’t view any widget area then, the theme doesn’t support the widgets.

There are different types of widgets, so if you want to create a plug-in for WordPress users then installing GetSiteControl widgets on the WordPress is the easiest way. Below specified are the steps for adding and using widgets in WordPress, which the WordPress development company uses.

Steps To Follow

  • You need to download the plug-in from the WordPress plug-in directory. The Plug-in would be downloaded as a Zip archive.
  • Then you have to open your WordPress dashboard and go to the plug-ins and switch to upload tab.
  • Then you need to click on Browse to browse the local hard drive of the computer and elect the zip file that was downloaded.
  • Then you need to click the Install Now for installing the plug-in from the zip file.
  • Once the plug-in is installed, click the Activate button.

Installing the widgets

WordPress comes pre-packaged with variety of Glossary Widgets. If these are insufficient for your needs, then you can install the new ones by searching the WordPress Plug-in Directory that is accessible from the WordPress administration Plug-ins and adds new screen.

Are you ready to launch your own hosted WordPress Blog in five steps ?

WordPress is currently the globally preferred platform for creating blogs for circulation of information or sharing of news. In this article, we shall be dealing with some of the basic steps to host your blog and launch it within minimum time possible.

WordPress serves as the host to more than 50 million blogs and also holds the credit of being a publishing platform. The blogs on WordPress account for around 40 % of the total number of blogs available on the internet. The exact number of blogs cannot be exactly determined. However the audience of blogs amounts to a whopping 400 million, and this is only a singular method through which users interact with each other on the internet.

Now you know what the importance of a blog is. Without wasting any more time, we shall jump straight into the procedure of launching a self-hosted blog within 20 minutes.

1. Hosting

Any WordPress development company would advise you to select a host or the residence of your blog.

Some of the good hosting companies are http://godaddy.com and http://hostgator.com Chose hosting at your own will, after comparing plans that suits you best.

The price for hosting is paid as a tax to government agencies for running a business.
Search for viable recommendations on various online forums and get a popular web hosting service to get started.

2. Domain registration

You need to have an address on the internet, and your domain means the same for your blog.
This service can be availed free of cost from the web hosting service provider.

3. WordPress Setup

The popular software for blog creation is WordPress, and there is no doubt in that since WordPress web developers have been tasting success in all their ventures recently.
Installation of WordPress is completely free of cost and any doubts in the installation process can be cleared through easily understandable manuals.

WordPress can be set up via the hosting service provider, or you can manually download it from the website wordpress.org.

To set up via the hosting provider follow these instructions. You need to have cPanel as your hosting control panel for these instructions.

Step 1: Login into your control panel and click on Softaculous icon.

Step 2: Find wordpress on Softaculous screen and hover over that icon. You’ll see Install, Demo and Overview options there. Click on Install.

Step 3: Follow the instruction on installation page and your blog will be ready in no-time. If you want to install blog on your root folder (i.e. http://yourdomain.com/) than leave In ditectory empty.

Once installed you can than access your blog admin panel on http://yourdomain/wp-admin using your admin logins that you just provided while installation.

Keep in mind that installing WordPress in your system and signing up for a blog on WordPress.com are completely different.

4. Themes

Remember to keep your theme compliant with the subject you are dealing with on your blog.

For example, if you are writing a blog on wildlife and natural flora then the theme of your blog must be something similar to forests, depicting greenery with animals in the background. Just don’t cram up the blog’s manifestation with superfluous graphics.

You can find many free themes by going into wordpress admin and under Appearance, click on Themes. You will see the default theme attached to your blog.

And if you want to install new themes, you’ll need to click on Add New. Where you will find hundreds of free themes. You can preview and choose the theme you like and then click on Upload Theme.

If you’re looking to custom design the wordpress theme, any good WordPress Theme Developer can help you with that.

5. You are done

Finishing the above steps gives you access to a promising platform to show your writing expertise to internet users all around the world.
Login And Let Your Writing Do The Rest!
Blogs not only satiate our writing urges but also take information and messages around the world. You would never know if any random person in any corner of the world is reading your WordPress blog and that has quite a nice ring to it, doesn’t it?

Self-hosted blogs offer freedom from the heckling in the case of writing blogs on other platforms without any control on published content and editing privileges. The overall idea of crafting your blog may be deemed as an exercise in vain by many due to the technical repercussions associated with it.
But on a general basis, reading this article would rebuff such suggestions and provide you with a stunning and informative blog.

Need help?

We’re WordPress website developer and can help you if you need a hand. Please contact us here.